Connecting Azure to Azure DevOps with Federated Credentials and Service Connections

If like me, you need your Azure DevOps pipelines to access Azure resources, you need to set up a service connection. In this post, we will look at how to connect Azure to Azure DevOps using the newly recommended Workload Identity Federation Service Connections.
First, we will look at the Automatic approach, before taking a look at the Manual alternative using Managed Identities. These will allow you to connect Azure DevOps to Azure in a more secure way without the need for secrets that expire, app registration, or even a service principal.
A video version of this post is now available on YouTube
Initial Setup
When we use an Azure DevOps pipeline to deploy resources to Azure, we need to provide a way for the pipeline to authenticate with Azure. You will see in a task like the Azure CLI v2 task we need to provide a value for azureSubscription. This is the name of the service connection used to connect, so the first step is to create the connection.
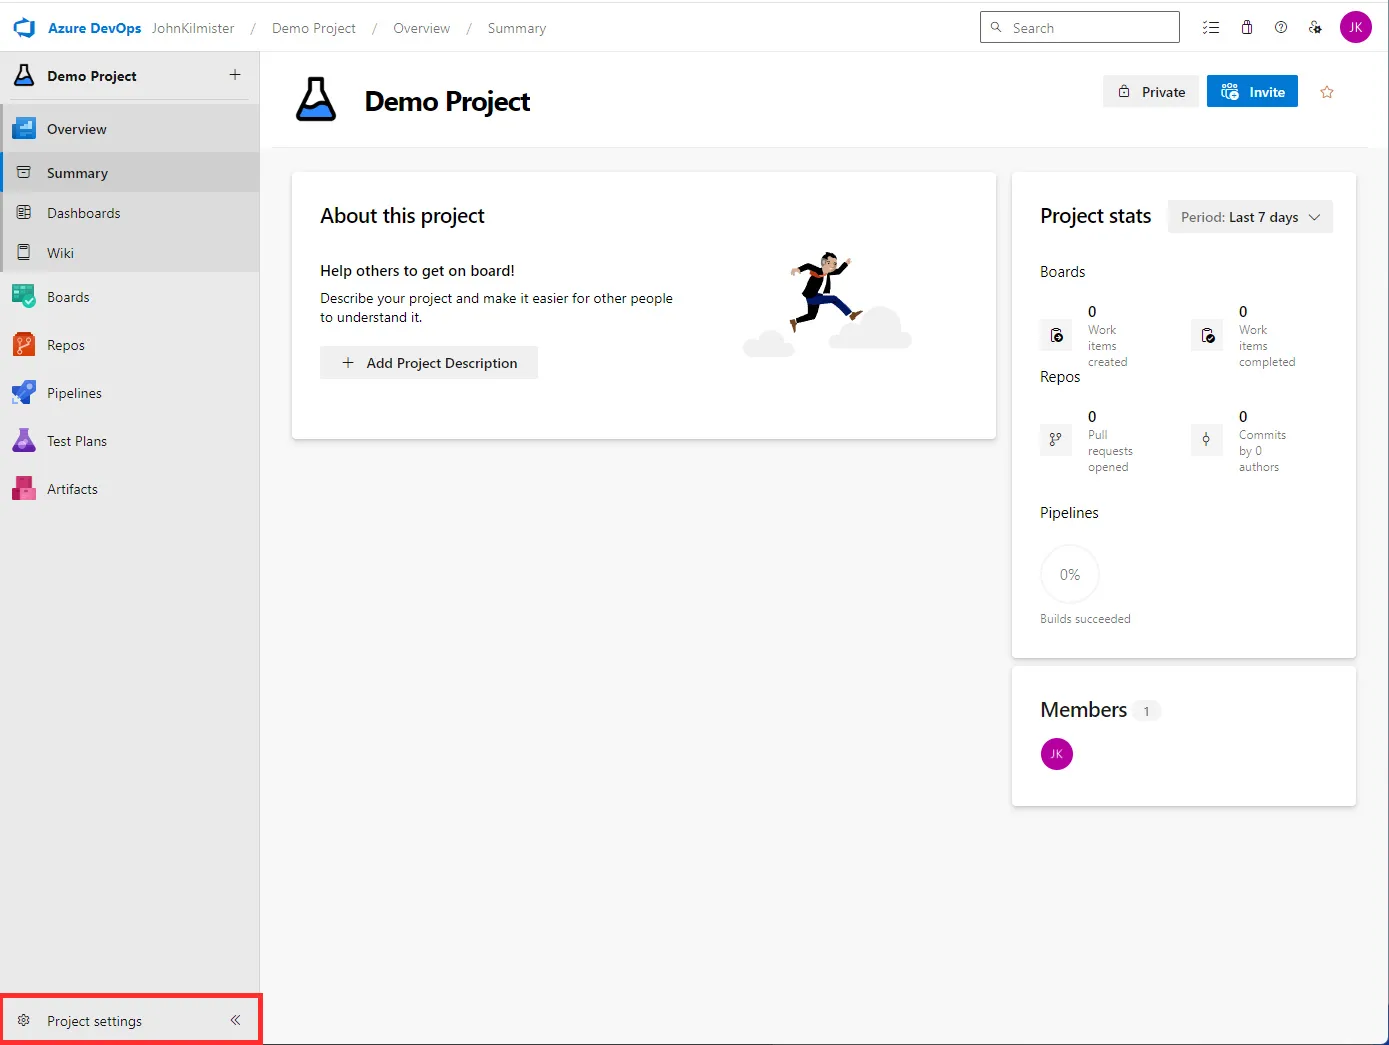
We set up all our service connections in the Project Settings.
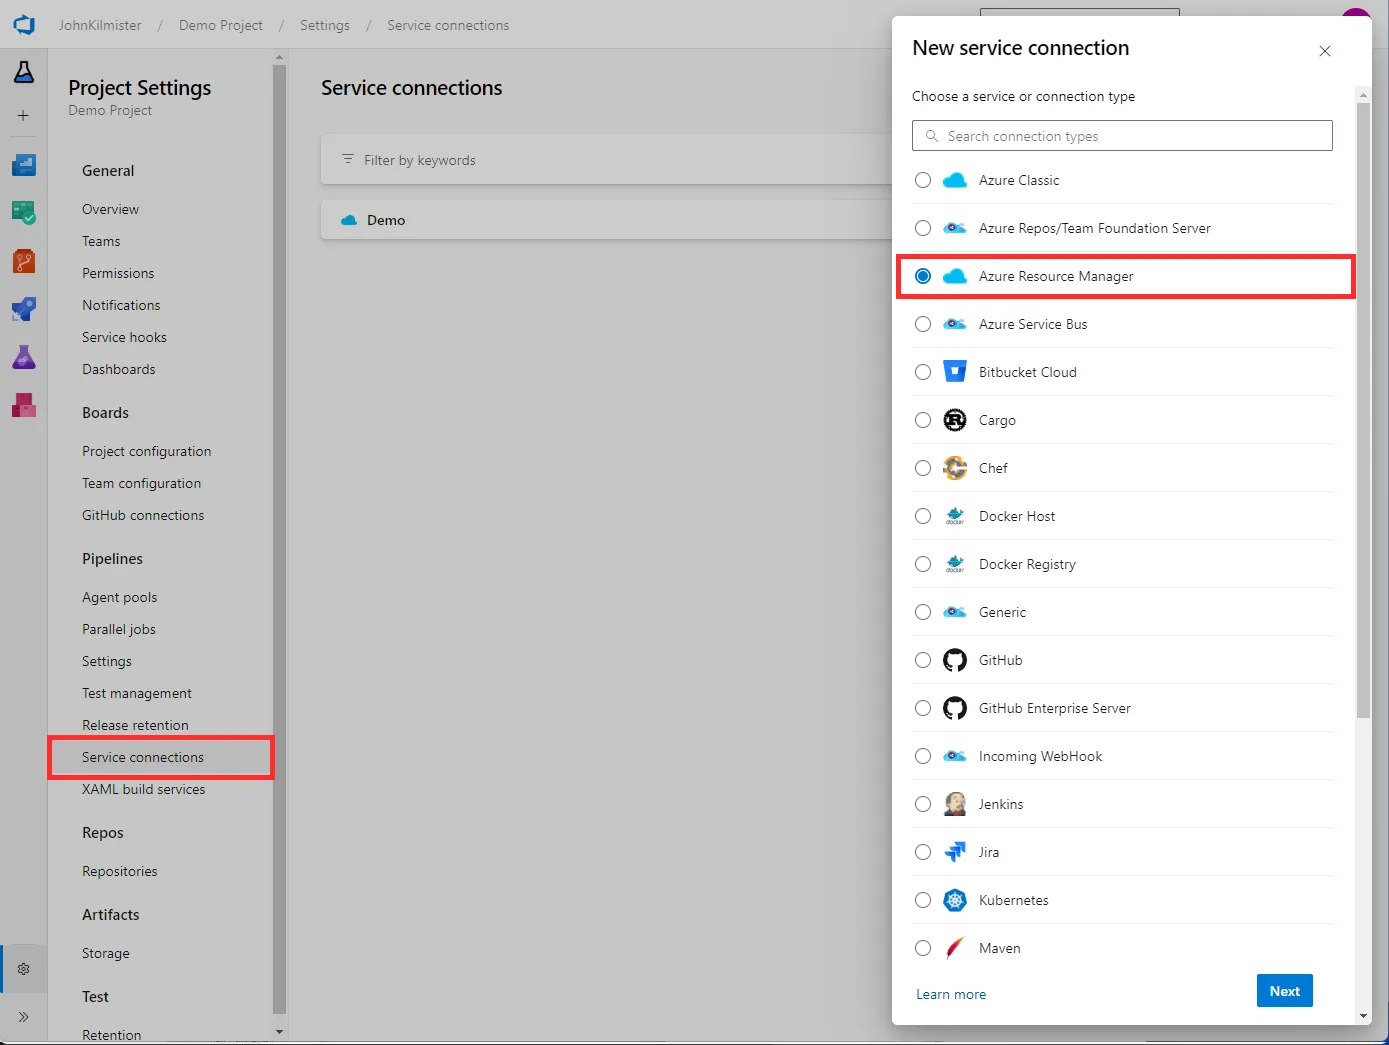
Selecting the New Connection option we can see the list of service connections we have available. There are lots of types of service connections, but for this post, we will focus on the Azure Resource Manager (ARM) service connection.
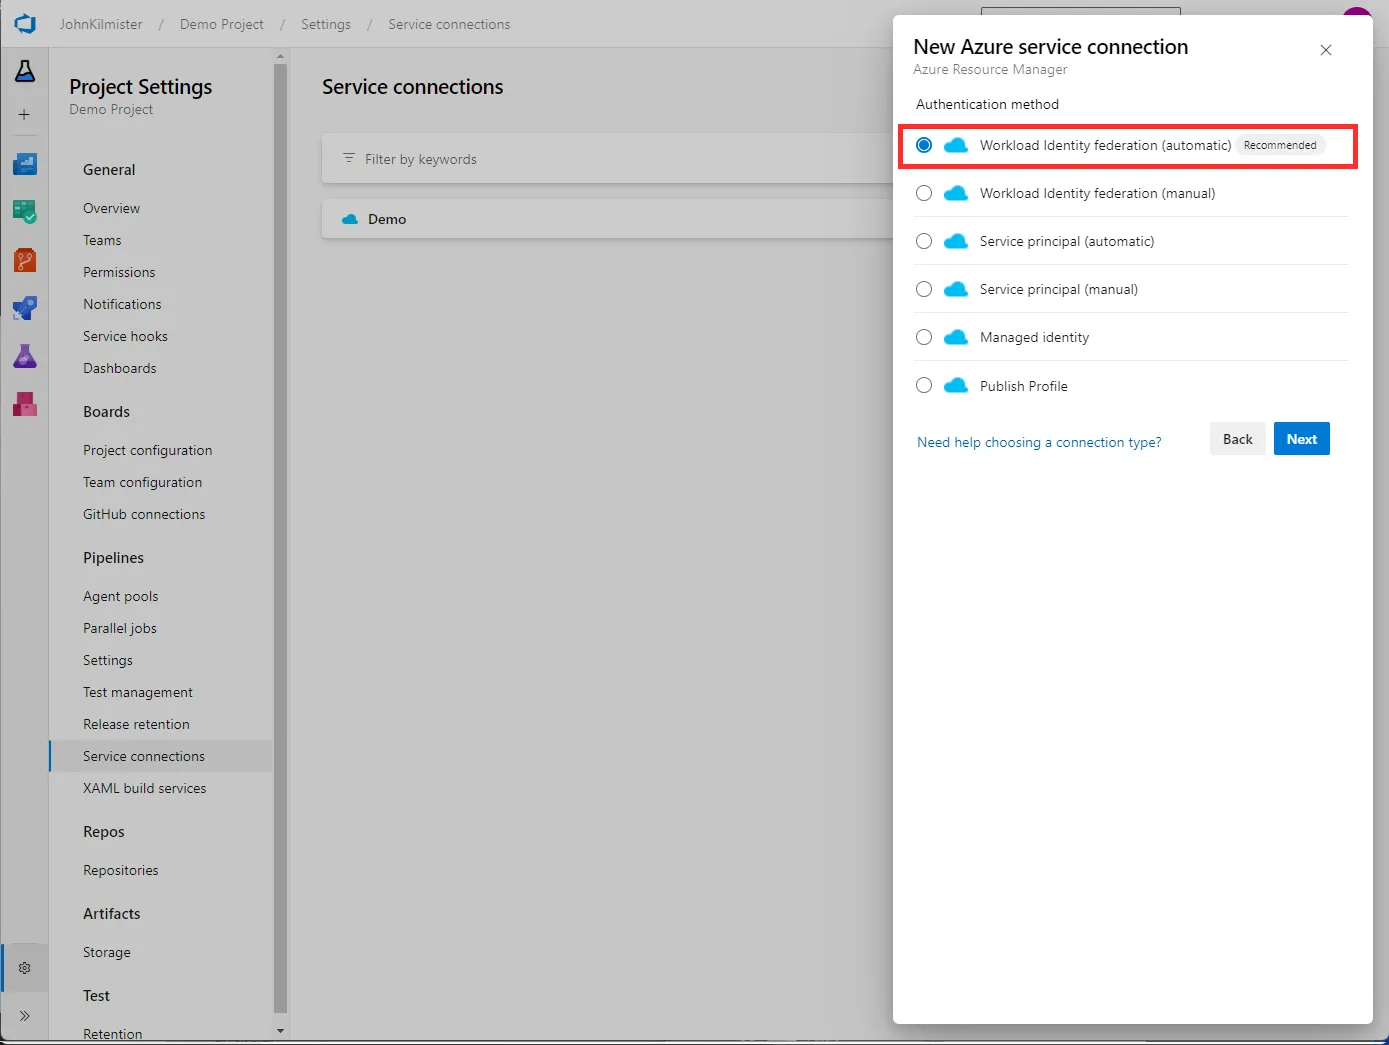
When we create a new Azure Resource Manager service connection we also now have many options. Traditionally we would have selected the Service principle however now we can use the preferred Workload Identity Federation option.
Benefits of Workload Identity Federation
The Workload Identity Federation option is the new recommended option for connecting Azure DevOps to Azure. It has several benefits over the traditional Service Principle option.
The main benefit is that there are no secrets to manage, no need to rotate secrets, and no need to worry about the secrets expiring.
In addition, the Workload Identity Federation option is more secure as the connection is scoped to the pipeline, so no other systems can use it.
Automatic Setup
The quickest way is configuring a service connection using automatic.
As with all ARM service connections we need to set the scope, to Subscription, Resource Group, or Management Group. For the Azure task, this is the default subscription that will be used. We also need to provide a name for the connection and select the subscription to use in the task. All other options on this screen are optional. Upon saving you can use the service connection in your pipeline.
Behind the scenes, this creates a new service principal and assigns the contributor RBAC role at the scope specified. The difference compared to selecting the service principle option on the first menu is that this service principle does not use a client secret, but instead federated credentials that are scoped to only your Azure DevOps project service connection. You can see these in the Azure portal under the service principle it has created.
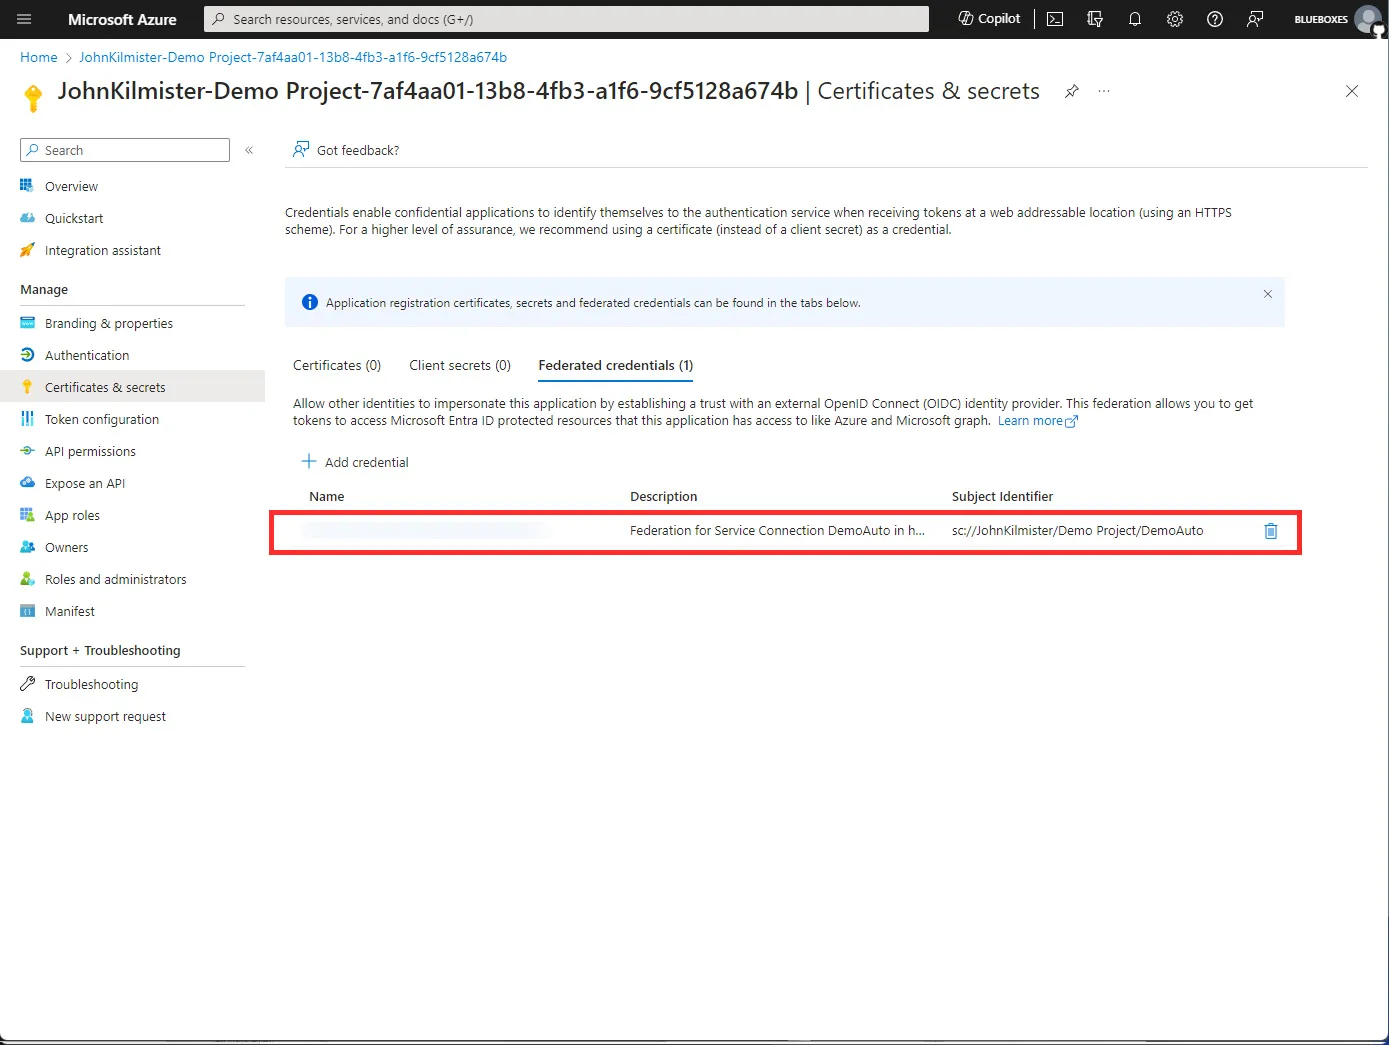
This option is good if you want to quickly create a service connection and don’t need to customize how it is created. However, if you want to customize the permissions or use different settings you can use the manual option.
Manual Setup
Sometimes you need more control over the service connection. For example, you may want to use a different tenant that you do not have direct access to, or you wish to use a Managed identity rather than a service principle with secure federated credentials.
Like before we need to initially select the `Azure Resource Manager“ option. This time however we will select the Manual option.
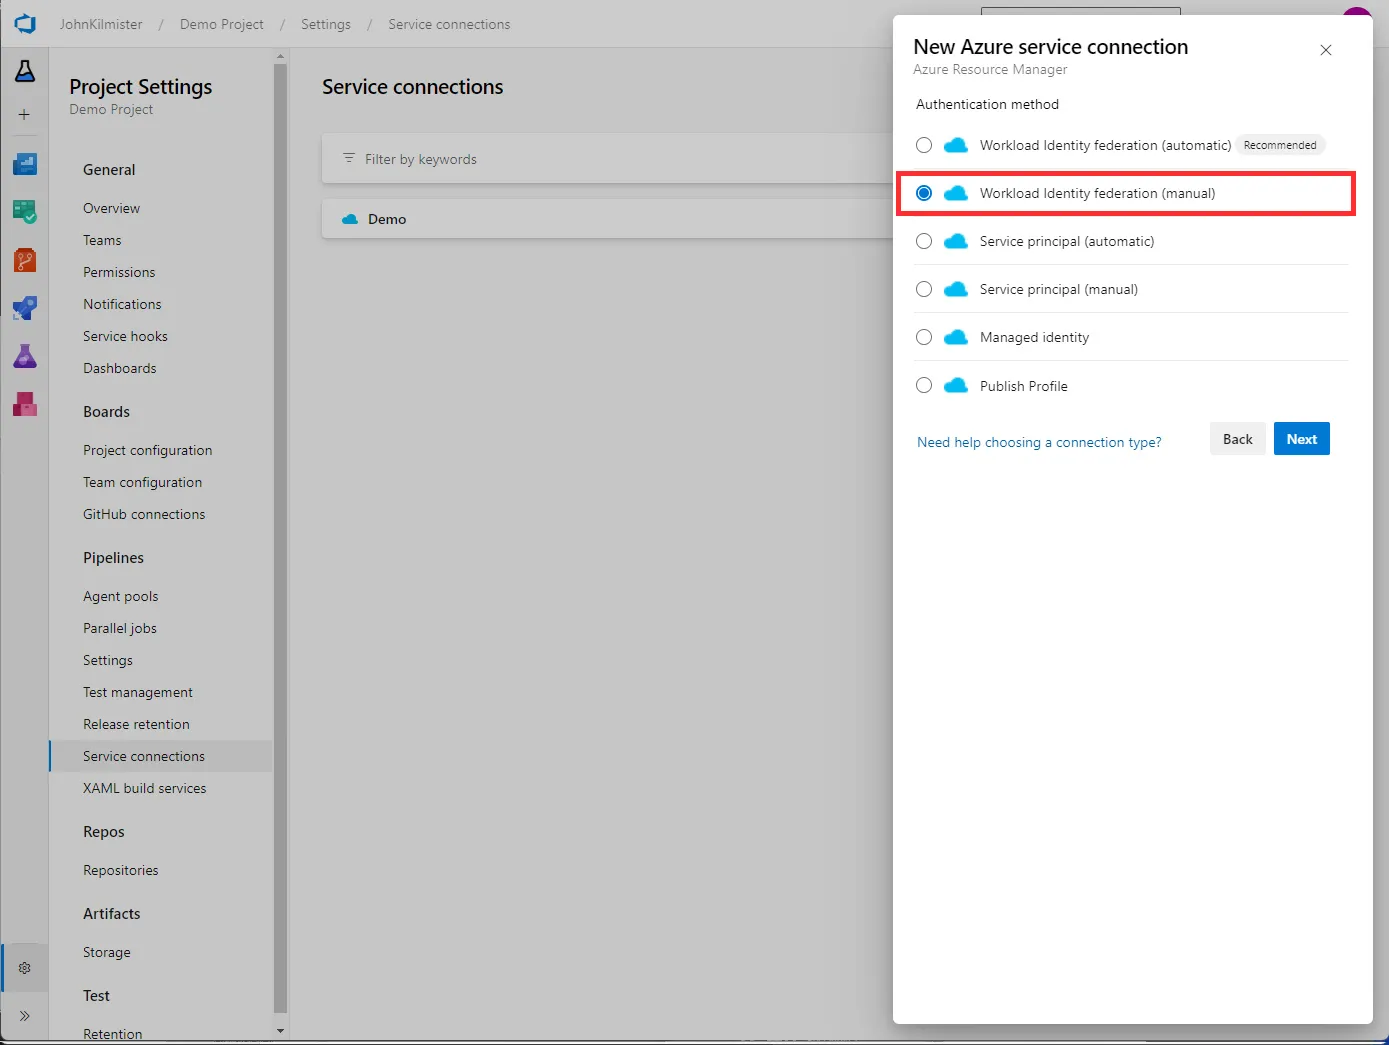
Initially, we set the Name that we will use in our pipeline and optionally a description. We are then shown several settings.
We need to go over to Azure to create a new managed identity. We can do this in the portal or using the Azure CLI. Alternatively, you can use one you have already created. It is this that will be used to access the Azure resources.
First, add RBAC permissions to the managed identity. At a minimum, this needs to be read at the scope you wish to apply it to e.g. reader on the subscription. You can also add additional permissions if required at this point.
Once done find the new Federated Credentials option in the left-hand menu and Add Credential.
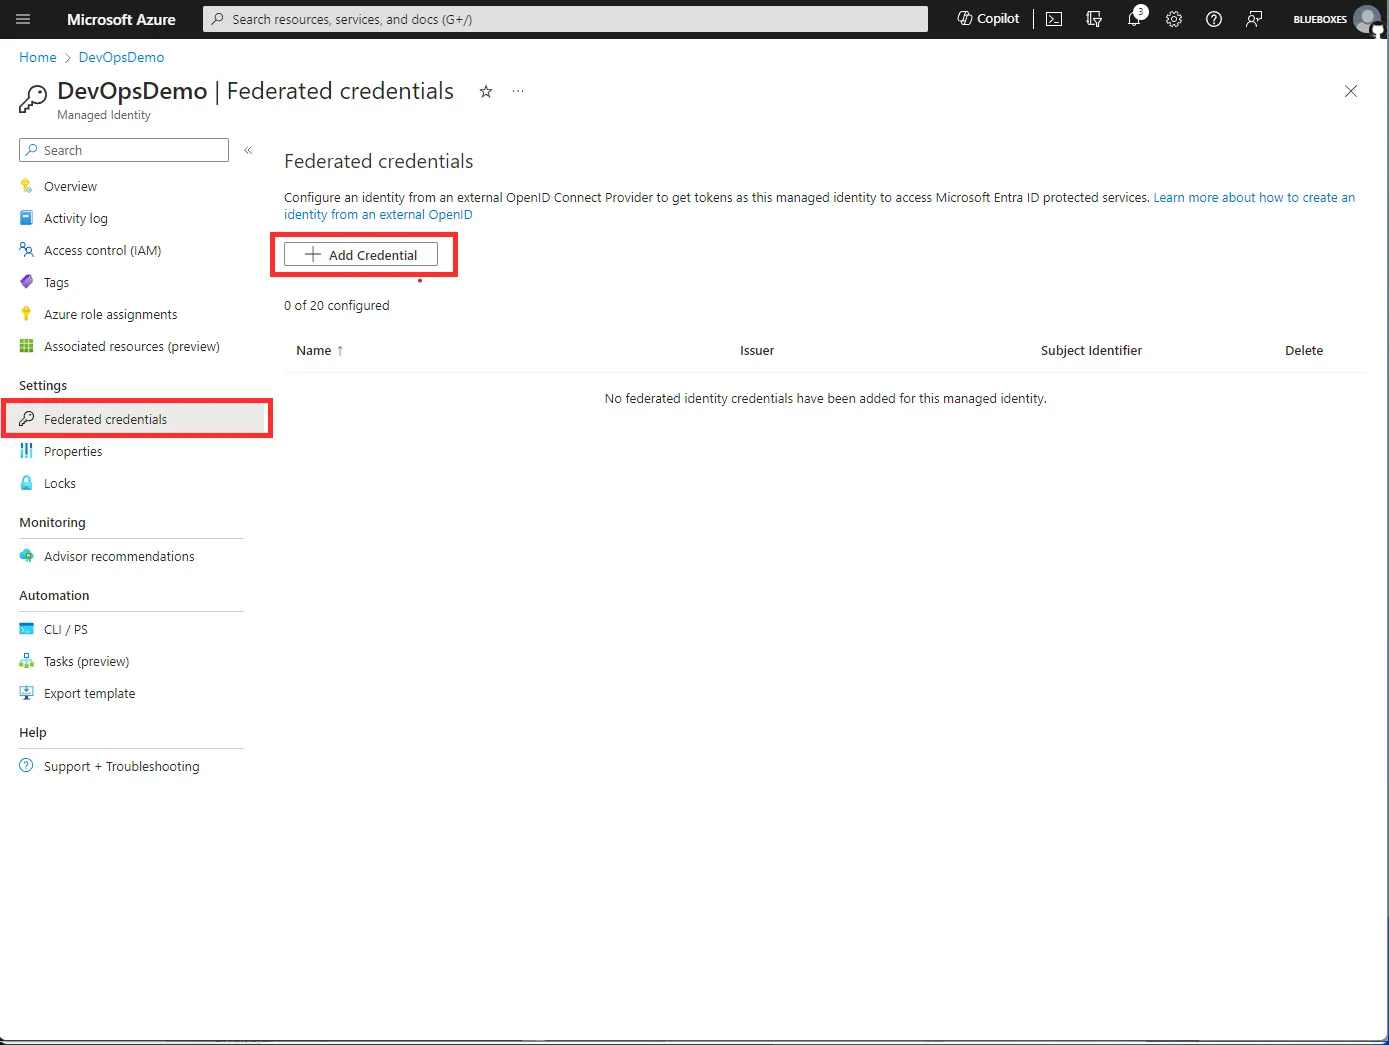
We can use Federated Credentials in a range of ways, such as with a Kubernetes cluster. However for setups with Azure DevOps, we need to select the Other option from the list.

Following this copy the Issuer URL and Subject identifier from the Azure portal and paste them into Azure DevOps. This will allow Azure to trust the Azure DevOps service connection.
Back in Azure DevOps, after adding the issuer and subject, we now enter the subscription ID and name that match that of the managed identity.
Next, we need to enter the Service Principal ID. This can be found in the Azure portal on the managed identity overview, confusingly this is under the label Client Id.
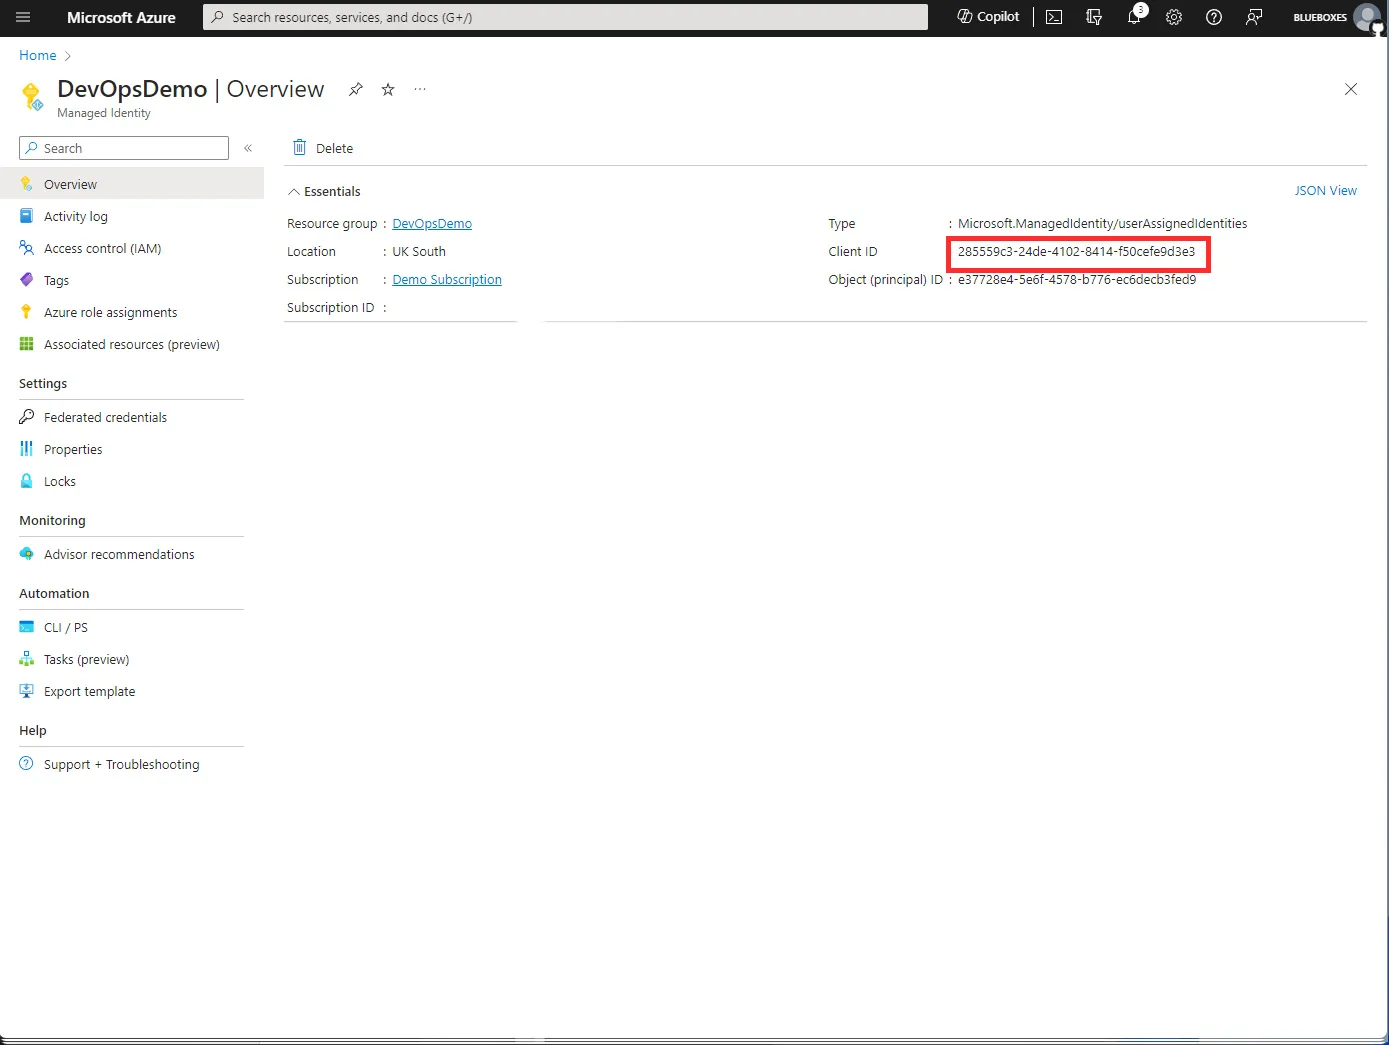
Finally, you need to enter the Tenant ID before you can verify the connection. This can be found in the Azure portal under Tenant properties via the main search.
Once saved this is then ready to use in your Azure pipeline via the name you entered.
Summary
In this article, we looked at how to connect Azure to Azure DevOps using Federation Credentials, Service Connections, and Managed Identities, using both manual and automatic setup options.
We also looked at the benefits of using the Workload Identity Federation option. These included the fact it eliminates the need for managing secrets and it provides a more secure connection scoped to the pipeline.
Title Photo by Mitchell Luo on Unsplash

