Reading and Parsing Inbound Emails with SendGrid and Azure Logic Apps

Emails are a really important part of the workplace and while sending emails is common in code, the ability to read incoming emails in Azure is not as well known. There are many great use cases from saving attachments to creating service desk tickets from inbound emails.
While you can use SendGrid with Azure functions and the StrongGrid library, in this article I will show you how to create a low code solution with Azure Logic Apps.
Initial Setup
The first step is to create a new logic app with an HTTP Trigger. Once you’ve done this and saved the logic app you’ll be provided with the webhook URL which is needed later.
To receive emails into your logic app we’re going to be using SendGrid and its Parse API. This provides a JSON payload via a webhook notification for each email message received. We will configure it so that all messages sent to a subdomain will be routed to the webhook and in turn the logic app.
To setup the webhook:
- Create a SendGrid account through the Azure portal
- Login to SendGrid using the
Open SaaS Account on publisher’s sitelink in the Azure portal. - Verify your domain
- Set up an MX record for your subdomain
- Configure the parse settings by selecting a subdomain and using the URL from the earlier HTTP Trigger.
Update the HTTP trigger
Update the HTTP Trigger to use the following schema, allowing easier use of the data in later actions.
{
    "properties": {
        "$content": {
            "type": "string"
        },
        "$content-type": {
            "type": "string"
        },
        "$multipart": {
            "items": {
                "properties": {
                    "body": {
                        "properties": {
                            "$content": {
                                "type": "string"
                            },
                            "$content-type": {
                                "type": "string"
                            }
                        },
                        "type": "object"
                    },
                    "headers": {
                        "properties": {
                            "Content-Disposition": {
                                "type": "string"
                            }
                        },
                        "type": "object"
                    }
                },
                "required": [
                    "headers",
                    "body"
                ],
                "type": "object"
            },
            "type": "array"
        }
    },
    "type": "object"
}
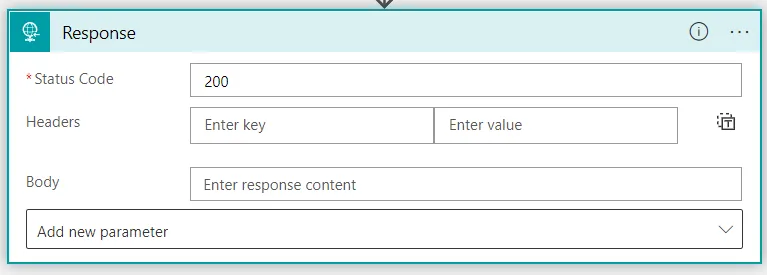
It is important to add a response block to send back a 200 response at the end of your logic app. If this is not added SendGrid will retry by resending the same request again.

You can test the initial setup now by sending an email to an address at the configured subdomain. You should see the logic app being triggered successfully.
Reading the Email
The email data arrives as an array of JSON objects inside a property named $multipart. Each item has a header and a body property.
 {
      "headers": {
        "Content-Disposition": "form-data; name=\"body\""
      },
      "body": {
        "$content-type": "application/octet-stream",
        "$content": "am9obkBpbmJvdW5kLmJsdWVib3hlcy5jby51aw=="
      }
The first task is to find the email property we are looking for in the $multipart. array. We can do this by adding a Filter Array data operation action to the logic app. This extracts a new array of matching items based on criteria.

The above setup filters the list where the Content-Disposition contains the field we are looking for. Next, we will add a variable action block to store the value that can be used in later steps.

The variable is set to an expression that uses the value from the content property that is converted to a string from base64. Note we are selecting the zero index to use the first match we found in the previous filter step.
base64ToString(body('Find_body')[0]?['body']?['$content'])You can repeat this process for any of the support fields. The full list of fields are documented on the SendGrid site.
Working with Attachments
Email attachments are more complicated than the other fields. Like finding standard fields the attachments are also provided in the $multipart array and again we can use a filter array action to find them.

This time we are looking for all array objects that contain filename. This will return a list which we will then loop through and manage each attachment in turn.
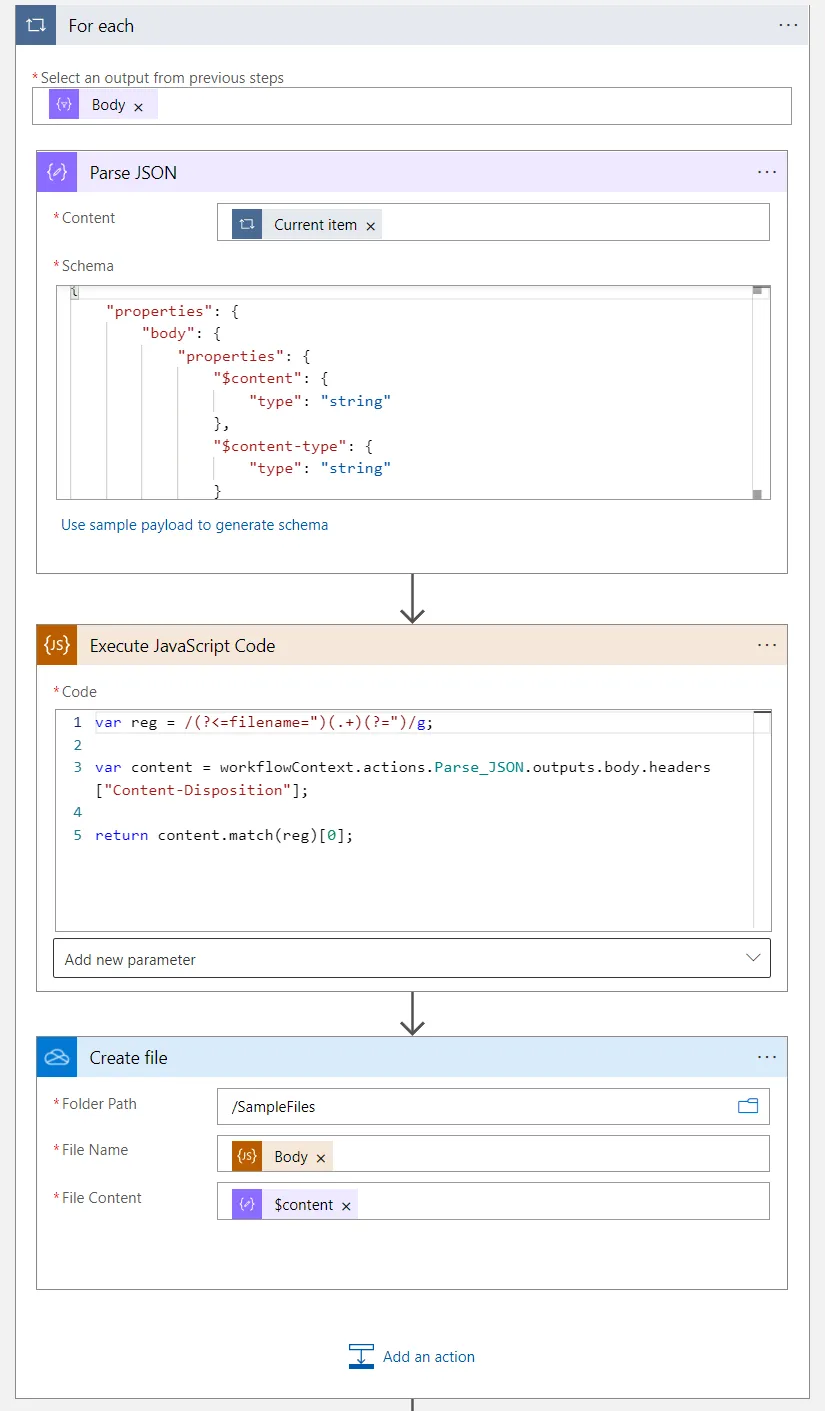
The first part is to parse JSON for the current Item, this will make it easier to work with. For this, we can set the following schema.
{
    "properties": {
        "body": {
            "properties": {
                "$content": {
                    "type": "string"
                },
                "$content-type": {
                    "type": "string"
                }
            },
            "type": "object"
        },
        "headers": {
            "properties": {
                "Content-Disposition": {
                    "type": "string"
                }
            },
            "type": "object"
        }
    },
    "type": "object"
}
Next, we need to extract the file name. This however is more complicated as it is part of a larger string value.
"headers": {
        "Content-Disposition": "form-data; name=\"attachment1\"; filename=\"sample.png\"",
        "Content-Type": "image/png"
      },
Complex string manipulation is not built into the available logic app functions. The easiest way to do this is via Execute Javascript Code block. Using this, we can take the value and use a regular expression to extract just the filename. Note that to use Execute Javascript Code block you will need to create and connect an integration account
The code for this block is just 3 lines and will return only the filename.
var reg = /(?<=filename=")(.+)(?=")/g;

var content = workflowContext.actions.Parse_JSON.outputs.body.headers["Content-Disposition"];

return content.match(reg)[0];
Finally, we can save the file attachment to OneDrive. For the filename, we will use the result from the Execute Javascript block. For the file data, we need to convert the base64 from the parsed JSON to binary which can be done with an expression.
@base64ToBinary(body('Parse_JSON')?['body']?['$content'])Once complete the blocks should look like this

For this sample, I have just chosen a hard-coded folder however this risks files with the same name overwriting each other so you will want to choose another strategy.
Summary
In this post, we looked at reading inbound emails with SendGrid. Although this is possible with Azure Functions we looked at the low code option using Azure Logic Apps.
The initial setup is well documented on the SendGrid website and once setup a JSON payload is sent to the webhook end point for each message received.
We finally looked at how we could use a Filter Array data action block to find the email properties and then how we can save attachments to OneDrive.
Title Photo by Yannik Mika on Unsplash

